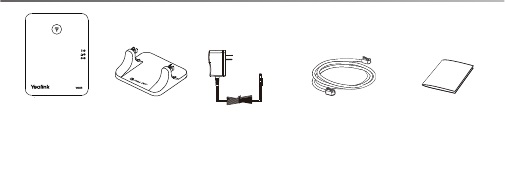
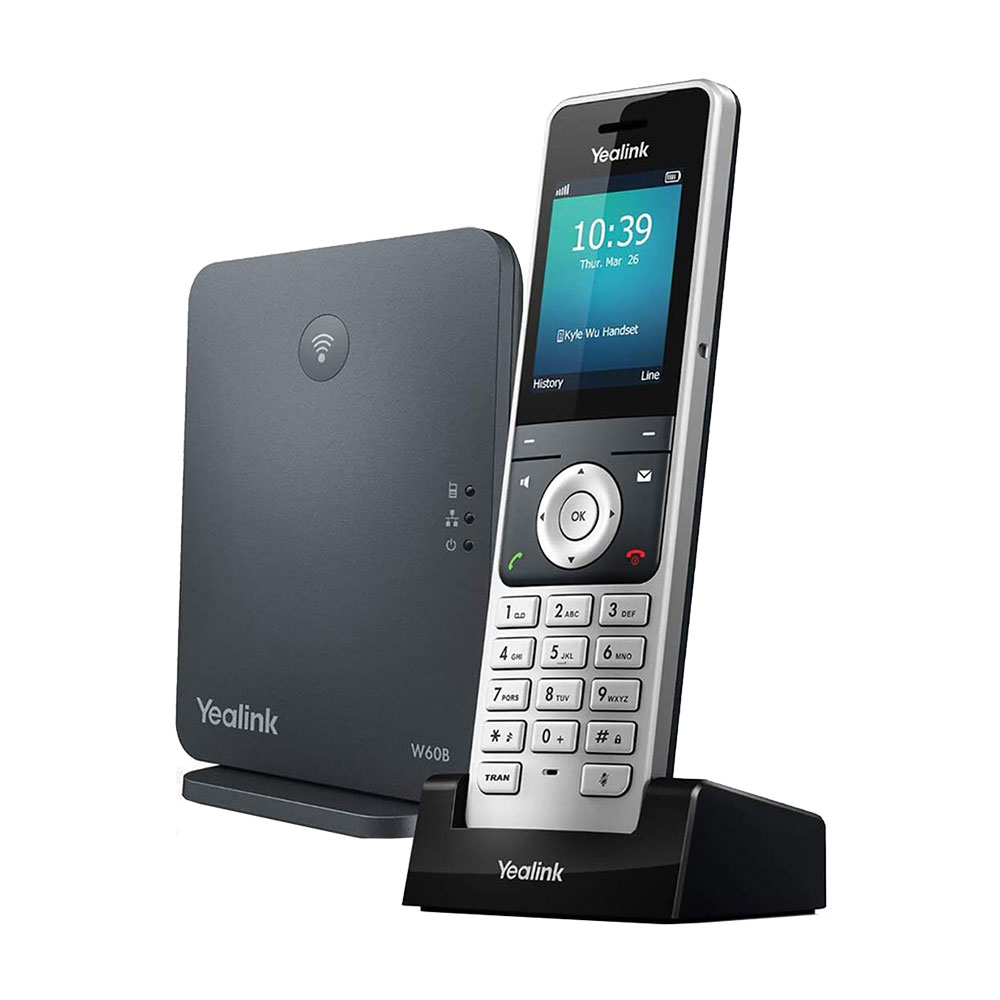
Step 1 – Hardware Power Up
- Plug the Base Station into the power
- Power ON the Handset
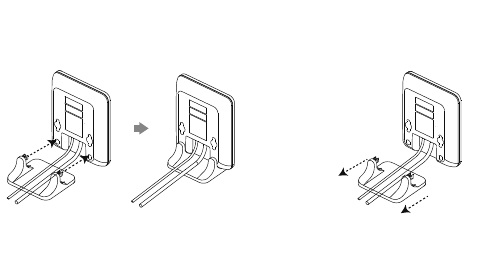
- Plug the Handset charging cradle.
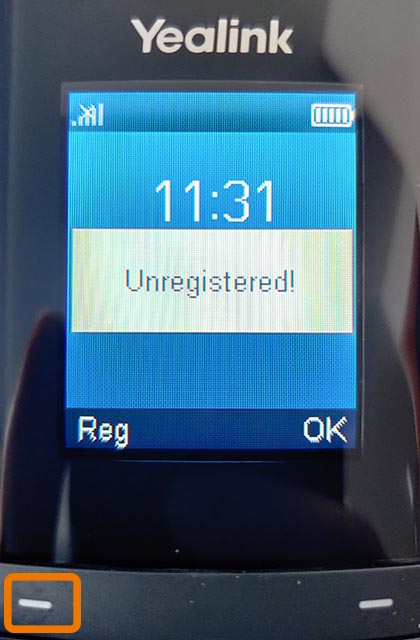
Step 2 – Handset Registration to the Base
- Long press the button on top of the base station till the registration LED slow flashes. (Top LED)
- Then press the REG. – The phone should say EASY PAIRING and complete. If yes, go to step 7.
- If this doesnt appear, press the OK key to enter the main menu on the handset, select Settings->Registration->Register Handset.)
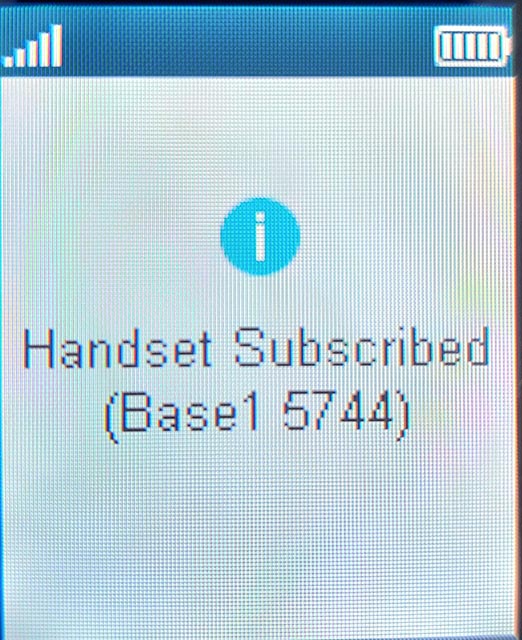
- Select the desired base and press the OK soft key. The handset begins searching the base.
- Press the OK soft key after searching a base successfully.
- Enter the base PIN (default: 0000), and then press the Done soft key to complete registration.
- After the success of registration, the handset LCD screen prompts “Handset subscribed”.
- If you have a second or third handset, simply repeat the process for each Handset.
DD10K USB
Please note that this process may take a while and the desk phone becomes inoperable during firmware upgrades which may take upwards of 15 minutes.
Insert the DD10K adapter into the USB Port located behind the screen of the desk phone.
Once inserted, the USB Dongle may perform an upgrade. The phone is inoperable during the upgrade process and do NOT power off the phone or remove the DD10K during this process.


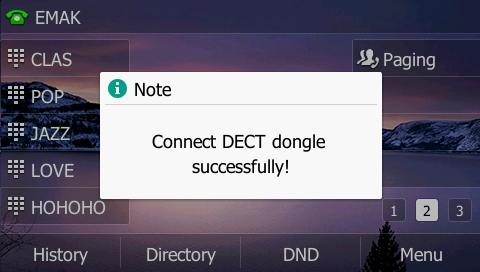
Once the Upgrade is completed, you should be greeted by this screen (only stays for about 3 seconds):
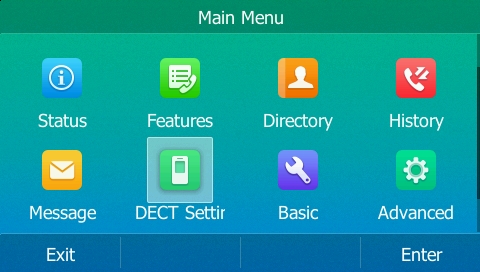
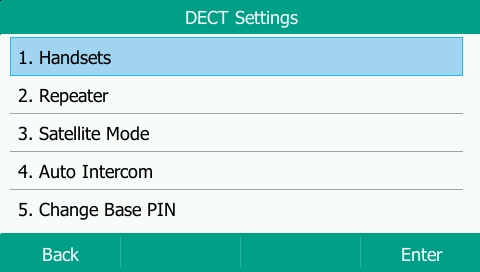
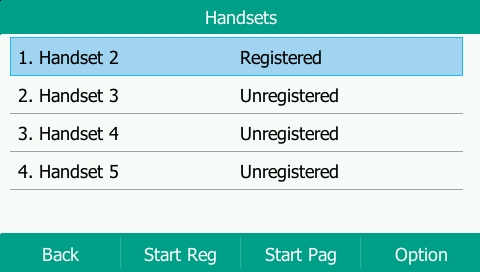
On the desk phone, go to Settings, Basic, DECT Settings
Then go to Handsets.
Select the handset number you want to register (Usually start with Handset 2).
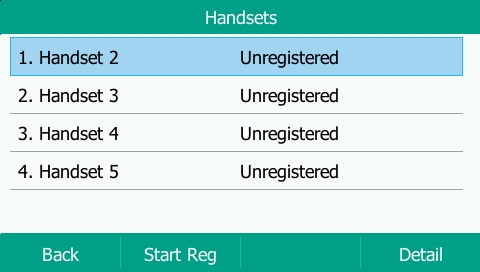
Press “Start Reg” button, then on the handset, press Register and OK to Subscribe to base.
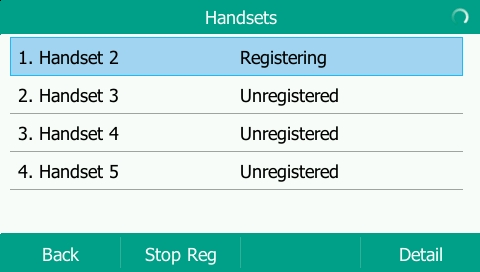

Once Registered, the handset is ready to go.
Notes:
With DD10K, desk phone is considered as handset 1, so the first handset is considered handset 2
By Default, the desk phone is assigned all the lines, so it would have to be assigned only the lines that are required. This would be done by EMAK Tech support.